ARTFULLY AVOIDING THE LANDFILL (& driving my husband crazy) ONE PIECE OF JUNK AT A TIME

3/26/11

Introducing Macy Quinn!

Great Bundles of Joy!  

Our newest grandbaby arrived healthy, safe and sound Monday, March 21, 2011 at 1:23 a.m.


The precious gift of life never ceases to amaze me and with each and every addition to the family we realize how truly blessed we are.  Even though Macy looks a bit bored about it all, the rest of us were very excited!


Not even a day old yet and her daddy was trying to make her smile.


A tired mommy was all smiles and sunshine while big sister, Lauren, dressed "her" baby in one of Macy's new little outfits.  She's going to be a good little helper.


Macy was bright and alert during our visit.


Chandler was quite enamored with Macy.  It was love at first sight.


Big brother, Ethan, was busy making sure mommy was helping Lauren try some new shoes on Macy.  He's going to be a great supervisor, don't you think?


Most definitely Miss Macy is getting star treatment at home.


Yep.  Chandler, Ethan and Lauren are going to have a lot of fun with their new little sister.

With Macy, we now have eight grandchildren. EIGHT grandchildren!  Sometimes it is hard to comprehend the enormity of such bountiful blessings - but I'm going to do my best : )

3/20/11

Ceiling vs. Countertop

Golly.  It sure takes us a long time to accomplish anything around here.  Hard to believe it has been two weeks already since our competition began.

Glen definitely has the upper hand in getting things done - but he took two weeks off so he could get his project completed.  All I was able to accomplish was one little countertop.


Glen enlisted some help getting all those boards attached to the ceiling.  Caine thought it was a bit boring, but he was a real trooper about the whole thing.

My project wasn't nearly as difficult - but it was most definitely time consuming:

Day One:  Fill all the little nicks and dents with wood filler and let dry overnight.


Day Two:  Lightly sand (fine sandpaper)  the entire surface to smooth out the wood filler and give the primer a rough surface for good adhesion.


Once it was sanded, I vacuumed, cleaned with a damp cloth, let dry and went over it with a little TSP to make sure it was nice and clean and free of any gunk that would prevent the primer from sticking.

Then it was time for the primer which was rolled on with a small foam roller that comes with the kit if you order from Giani. (You really should check out their site to see all the beautiful contertops that have been created with their great product!)


Day Three:  After the primer is nice and dry it's time to start dabbing on the design.


That's a $1.00 bottle of water base acrylic paint found in the art supply aisle at Wal-Mart.  The sponge (also comes with the kit from Giani) is a sea sponge that has been cut.  It only takes a little piece to create a beautiful countertop!


Now the fun part... creating the design.  Put a little paint on a piece of cardboard, dip the sponge in the paint, dab it on the cardboard so there is barely any paint on the sponge, dab, dab, dab on the countertop and repeat until finished.


Days Four, Five and Six:  Apply top coat, stand back and enjoy the beautiful transformation!


Before
and
After:


Sorry - these pictures really don't do the finished project justice.  The bookcase I am converting to a food locker doesn't get any direct sunlight (and I have to work at night after work ya know) and the new countertop is so shiny I just can't get a good shot of it.  I think it is going to look really sharp once it is painted white and Glen hangs the doors he's going to make.

Oh, the ceiling?  So wrapped up in MY project I almost forgot to show you Glen's beautiful ceiling!


Isn't it great?  He found a bonus while he was remodeling - wiring for a light. 

He did a great job with his project which included painting all of the trim and the walls too!


Here's a picture of the livingroom (in the background) before Glen's magic touch:


This is just kind of a sneak peak as to our progress.  (Goodness - those ugly curtains have to go! And what a difference the time of day makes in the color of the paint.  The actual color is closest to the top picture.)

Stay tuned for the day we get it all pulled together!

3/13/11

Undoing Stupid

As you have probably noticed, I have red countertops in my kitchen.


As you can see, the back splash is also red and is comprised of the same Formica that is on the countertops.

(One day I will put the above pictured piano stool back together for your viewing pleasure.  For now, just concentrate on the redness of my kitchen, okay?)

I can't say that I don't like the red countertops.  What I didn't like is how worn and in need of a nice finish they were. 


So, like a moron - and because I read somewhere on the net you could do it - I put a coat of 
polyurethane on two of them.  What a mistake!  As you can about imagine, it scratched and chipped and became really ugly looking in no time at all and  we've been living with the ugliness of the error of my ways for about 5 years.

In 2009 I found a new product that was designed specifically for counter tops:   Giani Countertop Paint and decided to try it out in my laundry room.

I was very pleased with the results that went from this:


To this:

(See full details here)

So, ever since the great success with the laundry room countertop I've been thinking about doing the same in the kitchen, but I've been apprehensive about it because I just want to keep the red.  I don't want to add the faux granite colors and I just didn't know how to go about that.  I think I've finally figured it out!


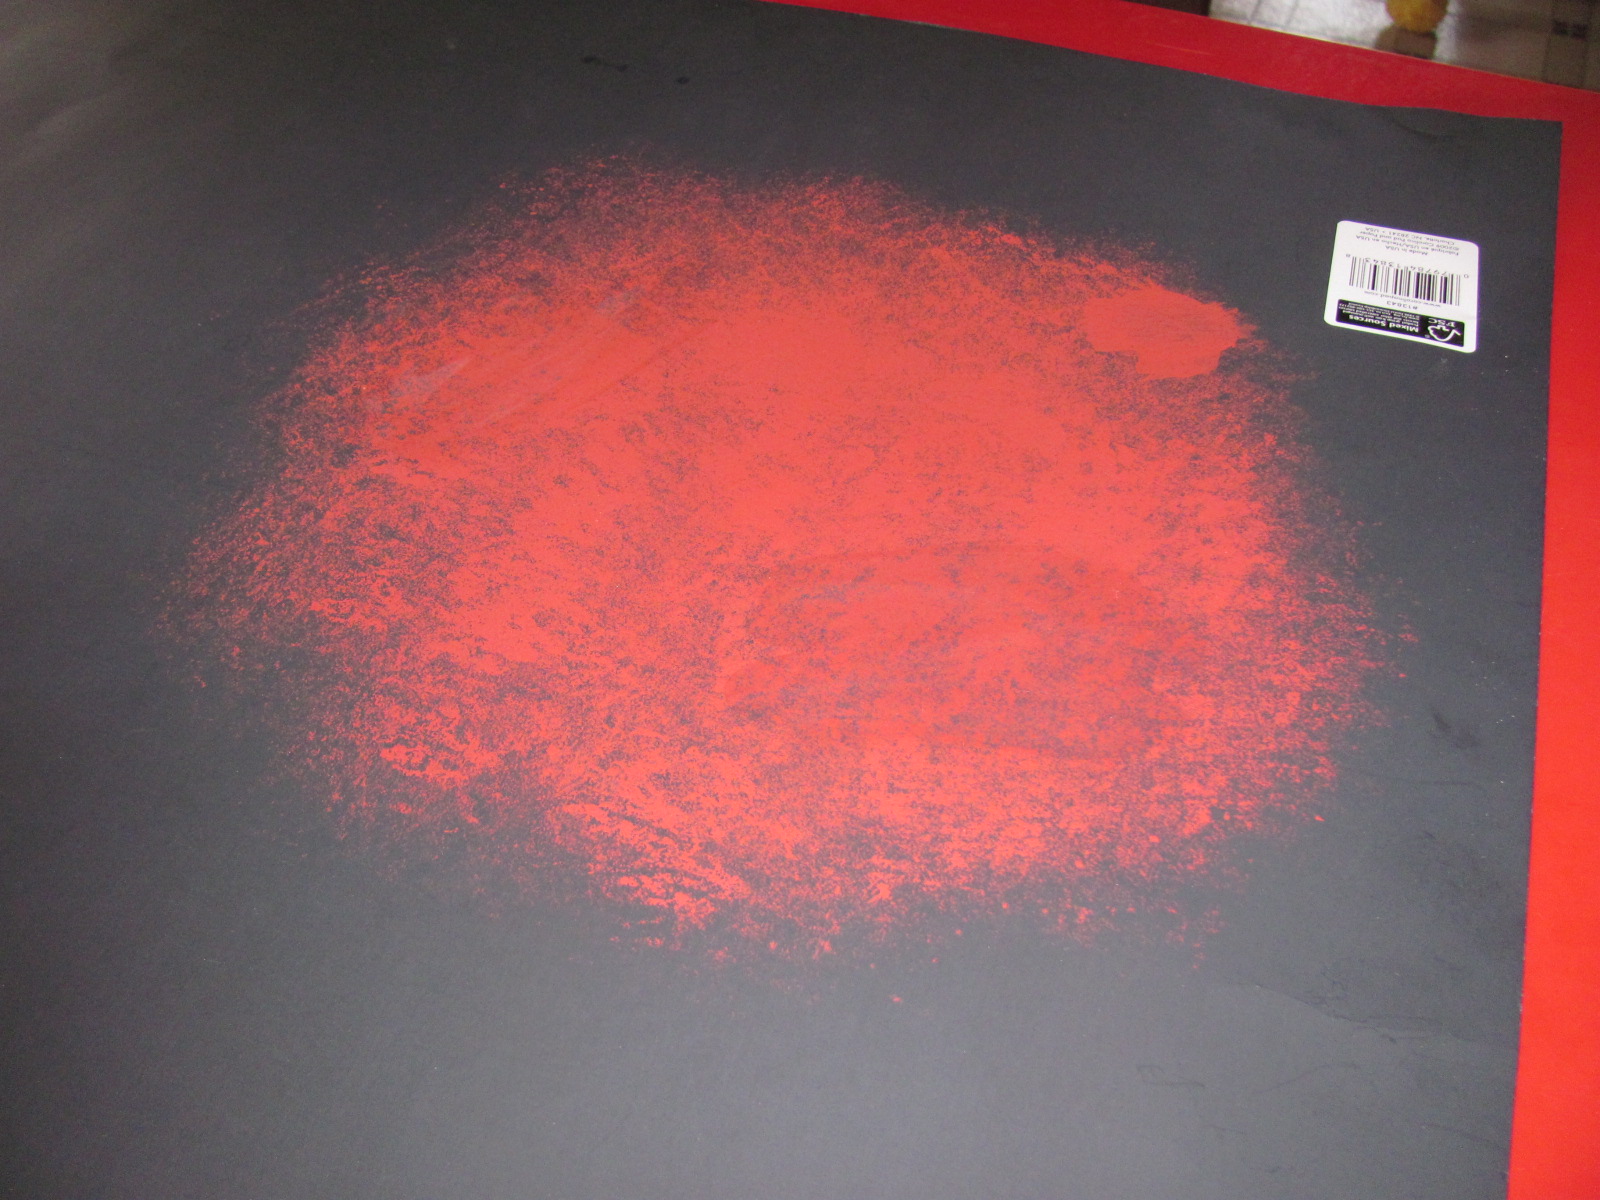
This is my "test plot" - and not a very good pictures, sorry.  It is tomato red acrylic paint sponged onto a piece of black poster board to see if I could live with what I think I'm going to do.


I think I can live with it!  (Don't worry - the actual color is not as bright as captured in the above picture!)

You can bet I have had my doubts about doing this, especially since all the experts advise against painting countertops, but, the laundry room countertop has performed beautifully - so scratches, no peeling, no problems with water.

So why now?  Right in the middle of my candle experiments and other little projects?  Why tackle the kitchen countertops?

It's all his fault:


Look what he did to my livingroom!

He took down the ceiling tiles, filled all the nail holes in the walls and started painting all the trim and crown molding!


AND


He's installing a beadboard ceiling - one board at a time!

I tell ya, the competition is fierce!

So, I spent my yesterday undoing stupid so I can start making the kitchen beautiful too.


Fortunately, the stuff came off relatively easy with a razor blade.

We've a lot of work ahead of us... we plan on painting all the woodwork white - including the kitchen cupboards.  Our goal is to have the livingroom and kitchen finished before Glen's family comes for their annual gathering in August.

Won't they be surprised??


3/2/11

Ironing Board Put to Good Use

I don't know about you, but I do not like your average, ordinary, have-to-use-it, ironing board.  Probably because I'm the wash 'n wear type.  I like to dress in clothes that look lived in.  Ironed outfits are reserved for weddings and funerals and such.

But, give me an ironing board with character and I go nuts!


Yep.  Got her at Streck Sales : )

Do you see all those notches in the legs for adjusting the height?  I just love the clever design.  She was only missing one piece....  the most important one, of course, but not to worry, we junkers are pretty good at improvising.


She came with lots of character too.  It took me a loooooooong time to remove all those nails, but I didn't mind.  After all, I fell in love with her at first sight!


I know I probably should've waited for the weather to warm up so I could work on her in the garage, but I just couldn't wait.  I laid her out on the floor in the kitchen, much to the chagrin of the guys.


Oh well.  They got over it as soon as the fumes cleared.

And now she has a new purpose in her life.  Not exactly practical, but trust me, I will never use her for ironing!


While I was waiting for the stain to dry, I whipped out the sewing machine and made a little welcome banner to outfit her with.  Gives her that "I belong here" look, don't you think?
Can you tell what I used for that missing piece? 


It's a drumstick!  

The boys got a little excited about that until I reminded them that they broke the other one.

I worked on a couple other things while I had the stain out... more about that later, but I am still working on my candles, trying to perfect them.  I got tired of jars, so I decorated a couple of cans and called it "good".  


Now I just hope the candles burn and throw scent like they're supposed to!

And, since my little ironing board is so very Donna, I think I'll link her up over at Funky Junk's Saturday Night Special!